
How to Pick the Perfect Snowshoe
GEAR REVIEWS
So, you’ve decided to dive into snowshoeing. Great choice! It’s like hiking, but with snow—and way fewer bugs. But now you’re staring at a wall of snowshoes, thinking, Do I really need to know what a “deck” is? Relax. Let’s break it down in plain English so you can spend less time overthinking and more time stomping through fresh powder.
1. What’s Your Game Plan?
Before you buy anything, ask yourself this: Where are you going, and what are you doing there? Snowshoes aren’t one-size-fits-all—different types are made for different adventures.
Flat Trails & Easy Walks: If you’re just cruising through the local park or hitting groomed trails, go with a basic recreational snowshoe. They’re comfy, beginner-friendly, and won’t break the bank.
Hills & Backcountry? Oh, you’re fancy. You’ll need something with a bit more grip and durability. Look for snowshoes with aggressive crampons (a.k.a. teeth on the bottom) to keep you from sliding all over the place.
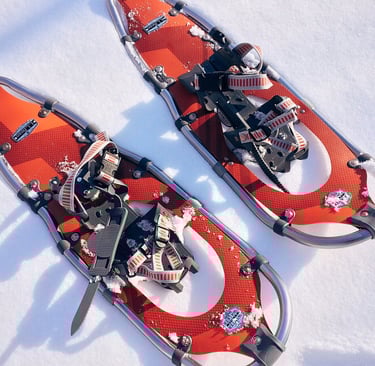
Powder Chaser: If you’re planning to tackle fluffy, deep snow, bigger is better. Larger snowshoes have more surface area, so you don’t sink like a stone.
2. Size: Big, Small, or Just Right
Snowshoes come in different sizes, and picking the right one feels a bit like Goldilocks. The size you need depends on your weight (don’t worry, you can factor in your winter layers and gear) and where you’ll be snowshoeing.
Big Shoes = More Float: For soft snow, larger snowshoes spread your weight over a bigger area, so you don’t post-hole (fancy term for sinking in snow up to your knees).
Smaller Shoes = Agility: On packed trails or steep slopes, smaller snowshoes are easier to maneuver.
Pro tip: Some brands have size charts based on your total weight (you + your gear). Use them—they’re there to help, not judge your snack habit.
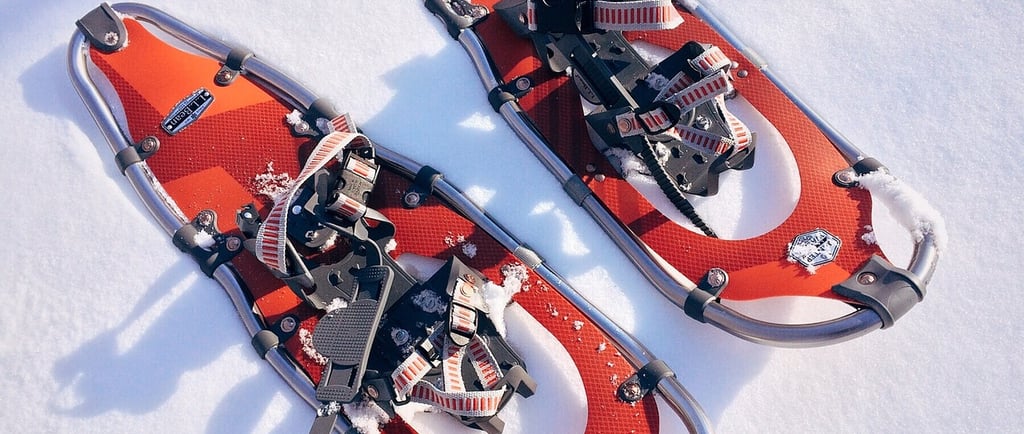
3. Bindings: Comfort vs. Frustration
Bindings are the straps that keep your boots attached to the snowshoes. They’re also the part that will make or break your experience, so choose wisely.
Easy On, Easy Off: Look for bindings you can adjust without taking off your gloves. Trust me, no one wants to wrestle with frozen buckles in the middle of a trail.
Stay Secure: The last thing you want is your foot sliding around or popping out mid-adventure. Make sure the bindings fit snugly but don’t pinch.
Here are a few types of bindings:
Strap Bindings: These are adjustable and often made of nylon or other durable materials. They’re easy to adjust, even with gloves on, and are great for most users.
Ratchet Bindings: These use a ratcheting mechanism for a tight, secure fit. They can be a bit quicker to use than strap bindings, but make sure they don’t pinch or dig into your boots.
BOA Bindings: A dial system that lets you adjust your snowshoe fit with a quick twist. They provide a secure, uniform fit, making them ideal if you’re looking for quick, on-the-go adjustments.
4. Grip: Don’t Skip the Teeth
Unless you’re sticking to flat, well-packed trails, you’re gonna need traction. Look for snowshoes with crampons or metal teeth underfoot. Bonus points if they have extra teeth under the heel for icy climbs.
5. Weight and Materials: Lighter Is Better, But Durable Is Key
Since snowshoeing often involves extended walks in snow, weight is an important factor to consider. Lighter snowshoes will reduce fatigue, especially on longer hikes, but durability is equally crucial. You don’t want snowshoes that’ll break under pressure or wear down after a few trips.
Frames: Most snowshoe frames are made from either aluminum (light but strong) or composite materials (durable and lightweight). Consider your intended use: If you’ll be sticking to flatter terrain, aluminum will usually do the job. For rougher, more demanding terrain, composites may offer additional durability.
Decking: This is the surface area of the snowshoe that actually floats on top of the snow. It’s typically made of either synthetic fabric or plastic. Synthetic materials tend to be quieter on snow and are great for lighter, more flexible snowshoes, while plastic decks are often more rugged.
6. Optional Bells & Whistles (a.k.a. Stuff You Might Not Need but Could Be Nice)
Heel Lifts: These little bars pop up under your heels and make climbing hills less of a quad-burner. If you’re doing a lot of uphill trekking, they’re a game-changer.
Carbon Fiber Frames: Super lightweight, but you’ll pay for it. Only worth it if you’re hardcore about backcountry adventures.
Color: Okay, this doesn’t affect performance, but if you’re going to spend hours looking at your snowshoes, they might as well look cool, right?
7. Try Before You Buy
If possible, rent a pair before committing. Most outdoor shops have rental programs, so you can test different styles and sizes to see what feels right. Plus, it’s a great excuse to get outside.
At the end of the day, the “perfect” snowshoe is the one that keeps you moving and having fun. Don’t get too caught up in the technical jargon—focus on what feels good under your feet. So grab a pair, strap in, and get ready to tromp through winter like a snow ninja.
camppiblog@gmail.com
This website may contain affiliate links, which means that I may earn a commission if you click on the link and make a purchase. However, please note that my recommendations are based on my personal experience and research, and the inclusion of affiliate links does not influence my content or recommendations.